Monday, February 28, 2011

Frugl February: repainting your kitchen cabinet knobs


before: HEINOUS!

Well I had just had it with my heinous brass cabinet knobs in my kitchen. HAD IT I tell you! And I couldn't bring myself to purchase 75 (yes, seventy-five) new ones for at least $3 each. I couln't even do that math. So out f necessity (or cheapnessity) came invention. Lighting Bolt! I ran to the hardware store for paint.I found this "Anodized Bronze" finish at Ace (whatever that means, but it looked nice) and went to work!

I removed all of the knobs, re-screwed them onto a couple of big cardboard boxes so they would stay stable, took them out to the garage and primed, then painted, then painted again. Within about 2.5 hours I had what looked like brand new kitchen cabinet knobs... for about $9.50.
It probably would have taken me longer to go to Lowe's, pick new knobs out, drive home and replace them. Now for the price of a salad and iced tea at Panera Bread I have new (to me) kitchen knobs, and I must say I also got a highly impressed husband thrown into the bargain. Excuse me while I pat myself on the back!
The best part is, there are so many spray paint finishes out there specifically for metal: if you can live with the shape of your knobs than you can have whatever finish you want. I have seen chrome, polished nickle, brass (blech!), oil rubbed bronze, copper... it's an awesome, super cheap way to update your kitchen with practically zero investment. Even the time investment was small: I finished mine during the baby's naptime and had them back on the cabinets before my husband came home for work. And I cooked dinner too. Thank god for crock pots.
I used this link for some advice, it was great.
After: AWESOME!!!

Sunday, February 20, 2011

Wishing for spring already

Oh this is bad. i am already thinking of things to wear... for SPRING and SUMMER! This always happens to me after the new year. So my plan is to resist any new winter shopping and save up for cute new warm weather duds... an especially good investment here in the south since come March we can have these glorious days in the 70s (or 40s, it's march after all). Check this out from this cute site

Saturday, February 5, 2011

Frugal February: DIY Board & Batten Shutters

I am in love with board and batten shutters. I have a traditional brick southern house and the most hideous plastic black shutters are stuck on there, totally ruining the effect of beautiful windows. Since one of the shutters keeps falling off, I am determined to replace them with something more charming and more sturdy.
Then I priced them out.
We would need 8 sets.
Some are up to $300 a set.
I can't count that high. Hey I have a Disney Cruise to pay for; i can't be spending money on shutters!
Then I just happened to see this post on Firefliesandmagnolias.com. Check it out.
Talk about saving some serious cash!

Tuesday, February 1, 2011

Have a Heart for Valentine's Day

I saw this adorable tutorial on Tatertots and Jello and had to try it. It took about an hour and a half (naptime!) but really is cute. The hardest part for me was getting the burlap to stay put. The easiest and most addicting was the coffee filter part. They look like carnation petals. I've been looking around the house to see what I can cover in coffee filter flowers. I am thinking a big ball topiary in a white distressed urn.
Lauren

Friday, January 28, 2011

Cruel & Unusual Punishment During Diet Season

http://www.picky-palate.com/
OK, I am seriously on a diet fitness thing right now because I am sick & tired of becoming grumpy each time I put on my jeans. I am not asking for miracles but I do want to get rid of a little excess baggage before menopause sneaks up and all hell breaks loose.
And then I saw this recipe for the world's most incredible and indulgent and diet-destroying cookies on the planet. Jenny's website is one of my favorites for dinner (and dessert) ideas.
You're welcome. Just eat them while on the treadmill.

Tuesday, January 25, 2011

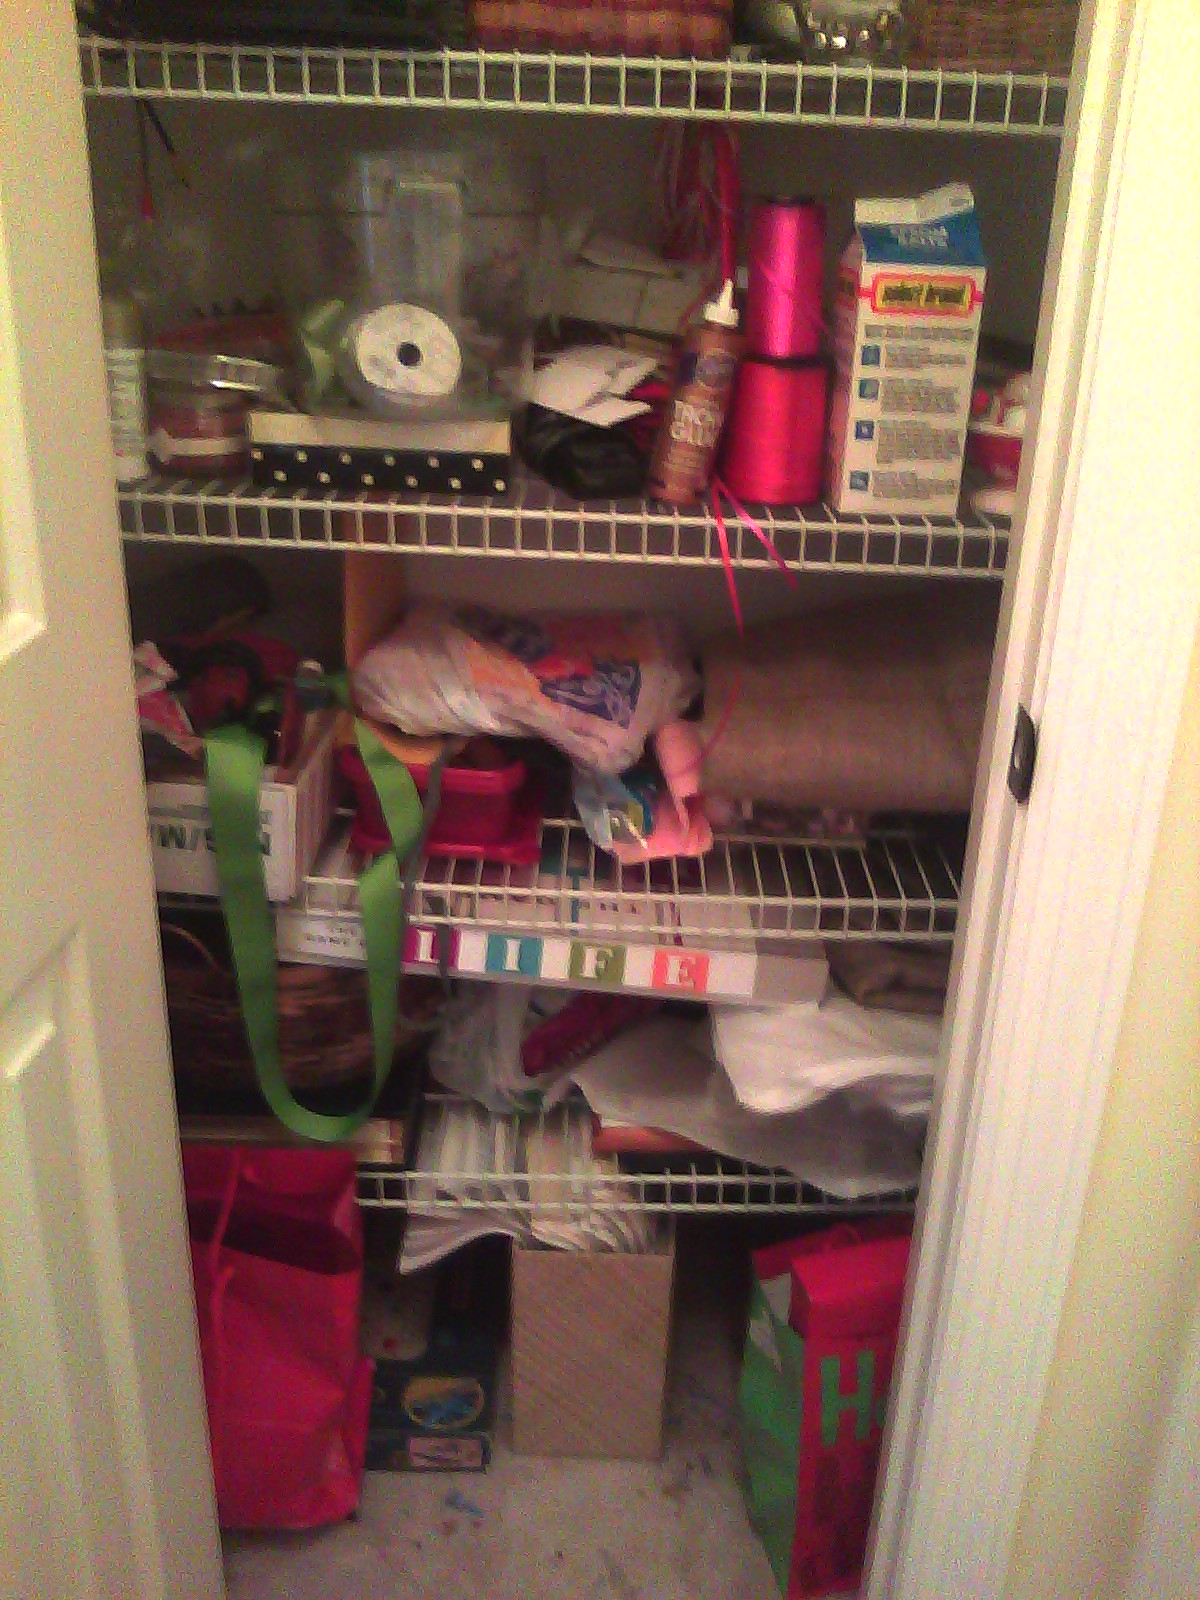
The Mount Everest of Closets Conquered

Ho boy, this one was a doozy. And it wasn't even as bad as it had been for years! I used to just cram everything random into this closet. Presumably it is meant to be a downstairs linen closet; it's situated next to the downstairs bathroom and guest room. Well, I don't need it for linens, I need it for STUFF, so it is now my craft/school supply /gift wrap closet. And there is room to add more stuff as I go along.
One big thing I did was dig out my old P-touch label maker (circa 2002) and start labeling the socks off of everything in there. Containers for all the little things, baskets for the bigger things. Apparently I used up all of my wrapping paper over Xmas, so I need to stock up again!
Before. Oy vey.


After.
I used an old cafe curtain rod I found on the floor at the bottom of the closet to hold ribbon spools; I just used the little clips to attach it to the (dreaded) wire shelves.

Of course my husband looked into the guest room and saw 75% of the junk that had been in the closet now piled in a corner. "So basically you moved the junk form one place to another." No!!! I boxed it up and it's going to our Social Services thrift shop tomorrow. So there!

Monday, January 24, 2011

A great Storage trick

I came up with this trick last weekend out of desperation: where am I going to put these out of season wreaths when they aren't in use??? If I stack them on a shelf they get smooshed.  At first I was thinking I would put hooks on the walls inside the closet where I keep all my holiday decorations. But that space is PACKED, no wall space to be had. So then what?
 I am sure I am not the first person to think of this, but here's my little idea:
Went to Dollar General and for $1 got 4 stick on hooks. Put them inside a closet door. Hung the wreaths. Closed the door. Sighed.
There's still room for one more. The valentine's day one I guess.

Friday, January 21, 2011

Mini Organizing Project


http://www.realsimple.com/
I was inspired last night while browsing the organizing tips on the Real Simple website. I actually enjoy their site more than I enjoy the magazine. Anyway, when I saw this little trick of sorting your makeup drawer by product type, I was in love with the idea because it appeals to my type-A sorting tendencies, and it was an easy solution to a dilemma I have always had: my bathroom drawers have forever been dire, and I hate it because it's the first thing I see in the morning and the last thing at night. So in honor of my committment to organizing the unseen areas of my home this year, let's see how this plan worked for me. And I am laying bare my soul by publishing these photos, I assure you. Try not to judge me too harshly.


drawer 1 before
 

Drawer 1 after
 

Drawer 2 before (sorry for the crappy pic)
 

Drawer 2 after


Drawer 3 before. yikes.


drawer 3 after
 
Bonus photo! Under the sink. Which actually has no before pic because it wasn't that bad. I keep a ziplock baggie full of mini toiletries ready to throw in my gym bag for those rare occasions I can be bothered to shower after working out and before running around doing errands.

 Well obviously I have too much makeup, especially in light of the fact that most days I go without because I never get out of my workout clothes until bedtime. But let's say some people collect art, I obviously collect eyeliner. My favorite site for a cheap make up fix is http://www.eyeslipsface.com/, which I talked about at this post.
 So I have one basket that I filled with those products I use everytime I do bother to put on makeup. Those are all together in the top drawer where I can get to them easily. The rest of the stuff is organized by type: eye makeup, skin, nail stuff, lip stuff, mineral makeup, and the hair stuff is in the bottom drawer. (I hate doing my hair. Is it me, or aren't there 50 other things we can be doing instead of standing in front of the mirror blowing hot air at our heads???)
First i vacuumed out the drawers; it's easier and less messy than wiping them out. I shed hair like a dog so the hand held vac it was! I lined the drawers with white tissue paper; it's cheap, can be cut to fit and can easily be replaced. But I love pretty drawer liners so I will keep a lookout for those.
Fingers crossed it stays this way. And I really hope my husband asks where the nail clippers are soon; he will not believe this until he sees it for himself!


Wednesday, January 19, 2011

A little Motivation & Guidance

Here is a pretty good webpage devoted to helping us get the house in order. It has kind of taken my punch list and put it up a notch. I like browsing through suggestions like these and cherry picking what works for me. I'm like that with all self-help regimes. Basically I am going to do what I want, but I just need help clarifying exactly what that is sometimes!
Today I did re-organize my bathroom drawers (post to follow) and cleaned out one of the closets downstairs that was full of the most craptastic variety of junk ever. Now it is practically bare and begs to be turned into a wine closet. Or a tiny half bath (wait, forget it, I already have too many toilets to clean as it is). I also finished my punch list, or at least the first draft of it. So slowly but surely I am making progress. I guess when a girl has time to worry about closets that means the rest of her life is going ok. Thank You Lord for my blessings.
I have also decided (I think) on the color scheme for the downstairs bathroom makeover, courtesy of my new blog background from Graphics Fairy.

free french picture frame graphic courtesy of the Graphics Fairy
 Have a wonderful day, and good luck with any goals you have!

Sunday, January 16, 2011

Great Giveaway!

I saw this great giveaway on  A Vintage Vine. It links to Keswick & Country, who is doing a giveaway of Dreamy Whites items from Maria's new shop. Got all that? Great sites from some remarkably talented ladies! browse and sigh...

Tuesday, January 11, 2011

A Girl Can Dream....

Well, we're digging out of 9 inches of snow. I don't mind and it is so pretty. But it does make me long for mild days full of birdsong. And then i accidently fell into this wonderful blog: http://www.thisisyourkingdon.co.uk/

courtesy http://www.thisisyourkingdom.co.uk/
 If you're an anglophile you can read and scroll and dream. And then you can look at this: http://www.thisisyourkingdom.co.uk/her-kingdom/topsham-lock-cottage-holiday-cottage-by-the-water-in-devon/
Think Spring!

Monday, January 3, 2011

New year, New to-do list

Well, Happy New Year! The plan of course this time of year is to clean out everything: diet, closets, hallway desk, kitchen cabinets. It's a tall order for anyone, especially moms and anyone who would rather be reading on their Kindle. So here is how I am approaching the New Year Urge to Purge:

This month I will take inventory of what needs to be done.
1) Make a Punch List. Room by Room, then outside, I will go through  each area as if I am putting the house on the market (which I am NOT!), and write down anything I think that needs to be done. Painting? Cleaning plantation shutters? Clean carpet? New faucet? Hang pictures? Patch hole in wall? Repair drawer knobs? New patio (think big people!) That kind of thing.
Then I
2) Make a priority list.
We have a big party for the Kentucky Derby in May. My guest bath has NEVER been painted in the (by then) 10 years we've lived in this house. I am ashamed to admit it, but it's true. And so I am hoping to do a little cosmetic surgery on the bathroom while we're at it. So all that will have gone on my list. But also I need to get a handle on the closets and cabinets... good cold weather indoor projects.
Then in late Jan/early Feb
3) Do it in bite sized pieces... and get help
Some of the projects I will write down will be above my head. We have a great handyman who helps us with it. Some of you have husbands who are Handy Mannys. My guy has other talents and we are all special in our own ways. But household projects are not his forte. So we pay a guy.
Also, I will be scouring the web for cute solutions.
4) When cleaning out closets, etc...be brutal about what you keep and what you toss.

My rule is: "If I were moving, would I pay someone to pack/unpack this item?" Generally it is a resounding NO, and one of three things will happen: it gets tossed, it gets donated, or it gets sold. I am thinking this year might be a good year for a yard sale. I didn't get that Canon Rebel from Santa: I am thinking a good yard sale in the early spring is just what I need to make a little cash. That and selling about a ton of Boden clothes on eBay.


*SIGH* in my dreams... courtesy of http://www.greenmindedmom.com/
So that's my plan, and it is one that can stretch the whole year long. Low pressure, people. Wish me luck, and good luck to you join your New Year's endevours.
country living magazine


Tuesday, December 28, 2010

Burlap fabric flower

I am obsessed with burlap and I am obsessed with fabric flowers. So I decided to marry the two and see what I could come up with. And it's super cute. I put a pin on the back so it can go on a pillow or a scarf or a t shirt. This one I gave to my friend who has started a business making burlap home accessories and gifts. I call her the "Burlap Queen".
I have gave all my kids teachers and a bunch of my friends these felt flowers for Christmas. They were so cute I am going to do hot pink and red ones for valentines day. Still looking for inspiration on appropriate fabric for summer...

Monday, December 20, 2010

Book Page Paper Chain


another totally crap photo courtesy of my cellphone

Wait, what are these things called anyway? Paper garland? Paper ring garland? paper chain? I don't know, it's been a few years since I had a kid in pre school. All I know is that this is one project you can have the kids help you with (although I didn't... I am too anal for my own good sometimes), and it's cheap. Dare I say for the cost of scotch tape you could have your very own Book Page Paper Ring Garland Chain all over your whole house. But as I said in a previous post, I am trying to keep it simple.
Seeing that as long as you have been to kindergarten you will know how to make these, the only "tutorial" I will include is the fact that I folded my book pages 3 at a time in quarters lengthwise and cut strips. And pick a book with long enough pages. A fat little paperback might yield strips that are too short.


As an amusing aside... the book I tore up to make this was an old water-damaged hardcopy of Madame Bovary. Adding a little "spice" to the holidays!


Monday, December 13, 2010

It's the Simple Things

Sometimes Christmas and the holidays can seem like the world's biggest excuse for excess, especially when it comes to decorating the house. My old method of getting the house ready for the holidays was to get everything I owned that was Christmas related and put it out, somewhere, anywhere! It was for many years an ill-conceived holiday mash-up.

88 cents worth of candycanes


euww I think i need to repaint the door to the garage

everything here is there year round, except for the snowy candle and the candycanes.
These days I take a much simpler approach (except on my two mantles where I have fun doing vingettes... but with a lot more care than in years past). I have really learned this year that it's sometimes the easiest, cheapest and simplest little decoration that is the real winner...
again i apologize for the crummy photos. I am hoping if I make the house extra-inviting I might get a good Canon Rebel digital SLR for Christmas...

Wednesday, December 8, 2010

Christmas Mantle Vingettes


I keep messing with my mantles... adding stuff, taking away. Somebody stop me! I think that today I may actually be done. i needed some greenery in the kitchen for my book page paper train and so I stole it from the Family Room. So I made a book page wreath to replace the green one. These wreaths are all over blogland and I love them but I was intimidated about the time it might take. Actually it took me maybe an hour. Which is why it isn't as awesome as this or this, but it's fine.

Wednesday, December 1, 2010

Laundry Room Rehab

Let's face it, we all spend WAAAY too much time doing laundry. And it will never end until we die, so we might as well try and make it a little pleasant.

Luckily you can't see the Mount Everest of laundry

Of course I have no before pictures of my laundry room becasue I never dreamed anyone would want to see it. Imagine if you will a square room, with builder's chalky white paint on the walls, nasty faux tile linoleum, brass knobs, dust bunnies and piles of laundry (naturally).
I am lucky to have a fairly large laundry room, upstairs. It also has a skylight so the room is always full of light. And it came with built in cabinets, to hide stuff, my favorite way to organize.
When we had a bathroom added on to the laundry room to serve the baby's nursery, I got to sneak in a little rehab to the laundry room. New paint, new floors, new cabinet knobs. And I tarted up the detergent and laundry sheets. It makes such a difference, and cost very little. (I did put some rubber matting under the burlap to help with grip). Of course you could make it even cuter by using a cheery fabric in place of the burlap.
 The jars are from Amazon but you can find them at Wal Mart as well and cost $9.99 for the large one and $7.99 for the small one. Seriously. I also got the metal scoops at Amazon, but they have them at the kitchen aisle at Wal Mart.  The tray was my own, but you don't even need it. And I am addicted to mini clothes pins (they are hanging from the tag on the cabinet knob). I use them to clip baby socks together in the wash, and also in the kitchen for closing bags. I also use them to hold things to a "memo ribbon" (stay tuned for that one), among other things.
 I also have the small glass jar with a small scoop on my kitchen counter for dishwasher powder. Just make sure if you do that you label it so no one mistakes it for sugar or flour!
Lauren

Sunday, November 28, 2010

No sew Burlap Flower Pillow


OK, this pillow is so cute and I don't have a decent camera so please forgive this crappy photo. First of all, mea culpa, I cannot sew, although I have tried. So any projects that I do need to be no-sew or quick hand sew. If you can sew god bless you and you'll have a prettier end result than I will.
OK, so a few months ago I went bananas for burlap and bought 10 yards of it. I made table runners, pillows, a skirt for my weird entertainment system (that's a whole other entry), and much much more! Anyway, for a while I had these plain burlap pillows on a trunk in my family room, making me snore every time I walked by them. Then, Friday morning, I picked up a magazine off the floor. It was opened to a page that had this cute wool felt pillow with a huge flower on the front. I looked at it and thought heck I can do that! So while the baby licked jam off his toast in his high chair and Only Daughter and #2 Son waited for the bus, I cut out about 10 burlap flowers freehand, getting smaller each time I cut. then I glued them on, biggest first in descending order. Here's what I got (excuse the picture, again). Oh, I added a little fabric button that came with a blazer I got years ago.
 You could do this with a store bought pillow and embellish with a large or small flower, or try it in felt.
I am going to try this with the wool felt, as soon as I can get some on sale. I love projects I can do while still in my bathrobe.

Wednesday, November 24, 2010

I'm a sucker for silhouettes! Gift Idea Alert!!!!

Christmas Gift Idea Alert!!!!
I LOVE silhouettes, and I have since i was a little girl and my grandmother had silhouettes of my mom and her 4 siblings going up the stairs at her house. At one point I started pricing how much it would cost to have someone do them for me. Uh... thanks but no thanks. I couldn't even bear the cost of the frames!


So I googled "how to make a silhouette" and found some great links. Here is the one I went for. It was actually fun. Once I got all 4 kids to pose in profile, I downloaded the photos and follwed the directions at Older and Wisor, which is a really cute blog.

 I  used black scrapbook paper for the actual silhouette and a patterned one for the background. I shrank mine down and used $3.50 frames (half off) from Hobby Lobby. Shrinking the image down was a little awkward, next time I would leave it alone.
My husband asked me to do them again next year full size. I think I will make it an annual event, especially since #1 Son already has an adams apple showing on his silhouette (ack!).
Cutting out smaller ones is more difficult, too, especially the nose! My one tip is to move the paper, not the scissors. And maybe start with a big one. Good luck! Let me know how it goes! Oh, and these are great as gifts, especially for grandparents. Or father's day.
My husband thinks it's a riot that thier little faces are turned towrds that saying. Keep calm! Ha!

Saturday, November 20, 2010

Boxwood topiary for $1


Do you like my little owl? I got her at Ace Hardware.
 In honor of the new Harry Potter movie. Geek alert.

Ooh I just love a little "grace" for nothin'! I have had these two iron urns for years, and have probably killed a dozen ivy in those urns. I knew I needed something green and fresh for the kitchen Thanksgiving mantle so I took inspiration from my family room mantle which already has some preserved boxwood topiaries. I bought those a few years ago and they are still going strong. So I am not against the expense of preserved boxwood on principle; it's just that right now that kind of fun money is going straight to T-giving food and Xmas gifts.

Right, so I had my inspiration. And I had my urns. And I have about 6 boxwoods in the front bed. So I paid $1 for a rectangle shaped block of florist foam at the dollar store. 
1) I cut the block of foam in half and crammed each half into each urn so they were the same height.
2)Then I cut a huge plastic shopping bag full of boxwood clippings. Trust me when I say you will need waaaay more than you think.
Chia pet stage. Note Little Man in the upper right hand corner,
oblivious to mommy's funny hobby.
3) I started on the top. I made sure I did both topiaries at the same time so they would be fairly symmetrical, using bushy clippings at the corners.

place cuttings down center to start filling out sides.

4)Then I started down the sides, making a line down the middle of the side and filling in. Just work one side at a time. Fill in where needed. Done!
I know my preserved boxwood just needs to be misted occassionally to stay green... and I don't think I have done it since last year! I have no idea if these will wither and die or last forever (probably not). But in the meantime, they look pretty good for a buck!